Configuring our Freight Management Solution
A complete & step-by-step guide to get your Freight Software working
Odoo is a popular open-source business management software suite that offers a wide range of applications to help companies manage various aspects of their operations, including logistics. The logistics module in Odoo enables businesses to streamline and optimize their supply chain, inventory management, shipping, and related processes.
Freight/Transportation

Freight Management Solution is one of the 50+ custom made applications we serve our customers with. We have this solution now available in the latest version of Odoo which is V15 and that too both in Enterprise & Community with no or little differences. This solution has been implemented at various freight management & freight forwarder companies across the globe. Every solution needs to be configurable when it comes to its system settings & master data. This is also the beauty of Odoo based systems that everything is not hardcoded but we allow customers to set-up their systems the way they want to use. So we certainly need to know how one will be able to use this solution in the most efficient way by getting it configured well. Also when it comes to the configurations there are two aspects of any such solutions. A : It should be allowing its users to get things running smoothly with its master data. B : It should allow its users to have the complete freedom to create re-usable data as a part of the one-time configurations we perform prior to we start using it.
Overview of Freight Management in odoo
The freight management module in Odoo will help you to manage all aspects of your freight operations. Features like transporter details, Vehicle information, route information, with delivery order details are available in this module. It will manage all your transport entries.
1. Freight Orders-
When you install the module, an additional menu called Rental Management is created under the Freight menu. Go to shipping, then create the freight orders.
2. Freight order lines-
Add a scare order line. Choose the right shipping container, payment method and price. It will calculate the total cost according to the collection and cost. If we add more items than the box can contain, a warning message will appear.
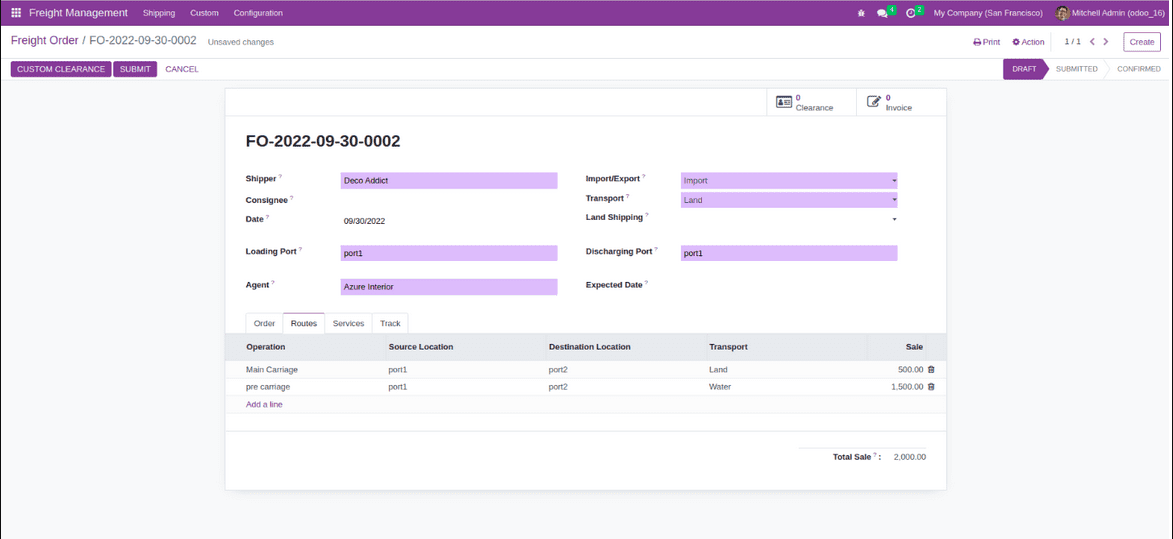
3. Freight Operation Routes-
Identify the load. We can also add actions to the method.
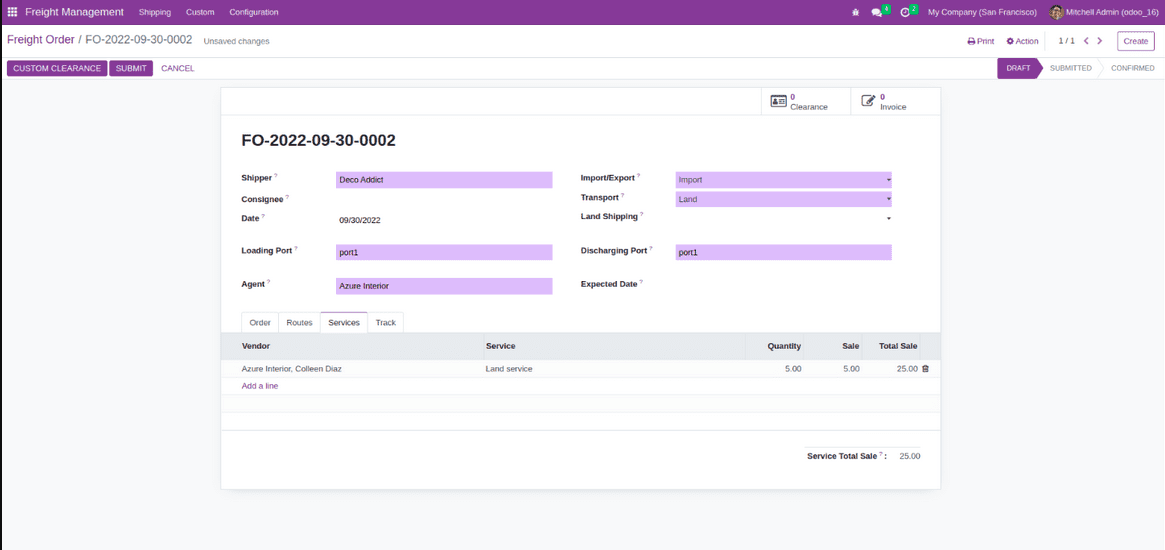

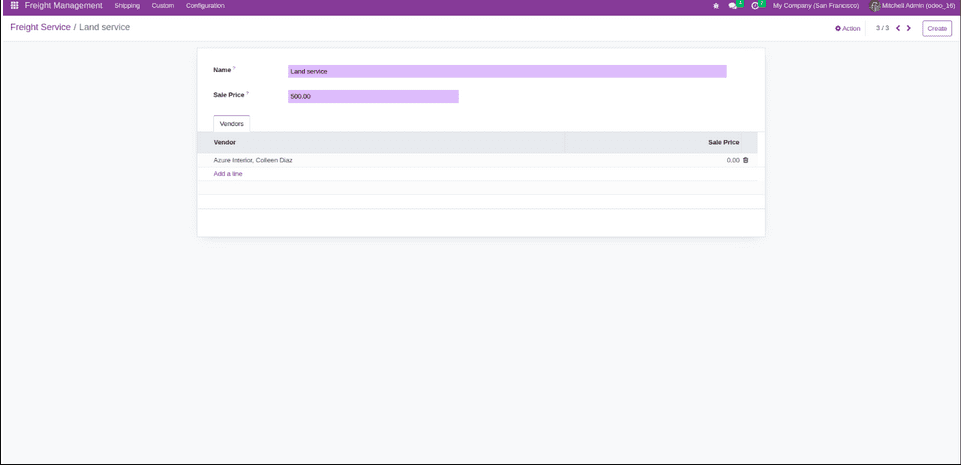
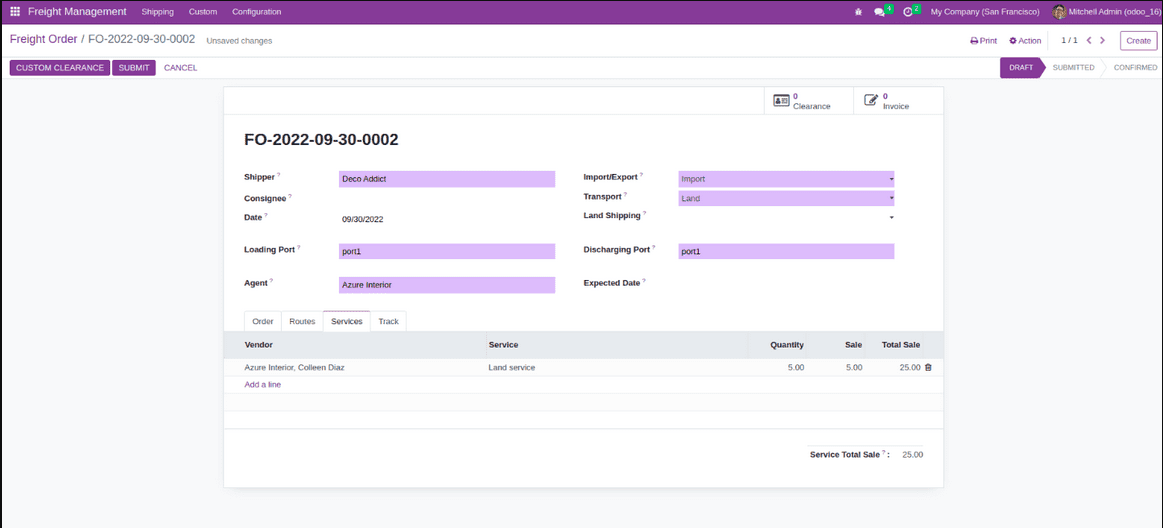
4. Freight Operation Services-
Defining the services for the shipping. Also, we can add the Services. We can calculate the total sale amount based on the vendor and the services provided by the vendor.
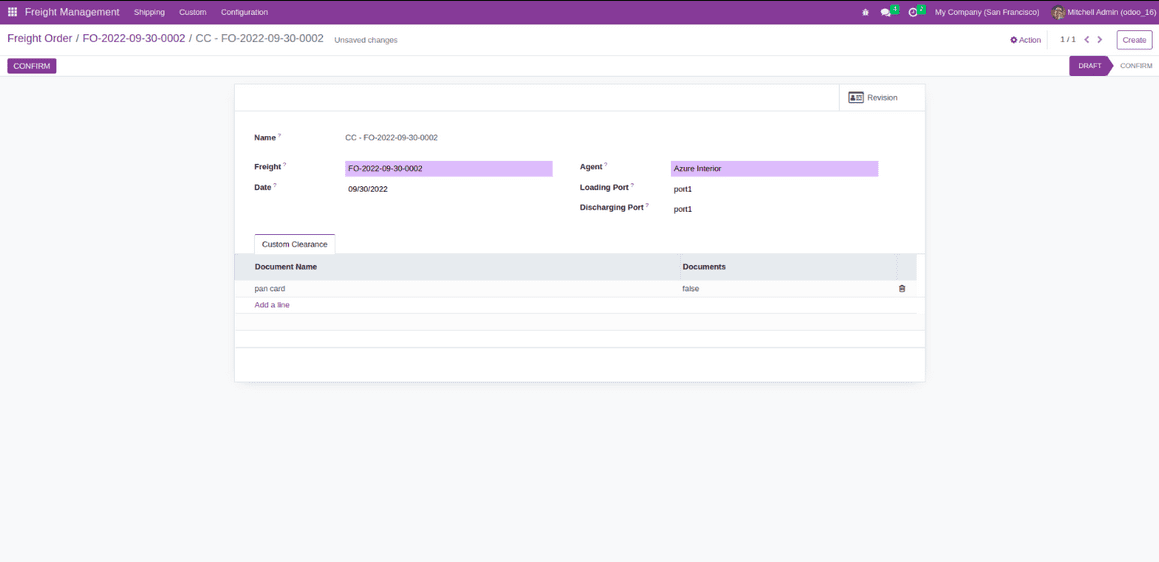
5. Custom Clearance-
We can create custom clearance for the freight order by clicking the custom clearance button. We can view the custom clearance in the custom clearance menu under the custom. After Conforming the custom clearance, we can confirm our freight order.
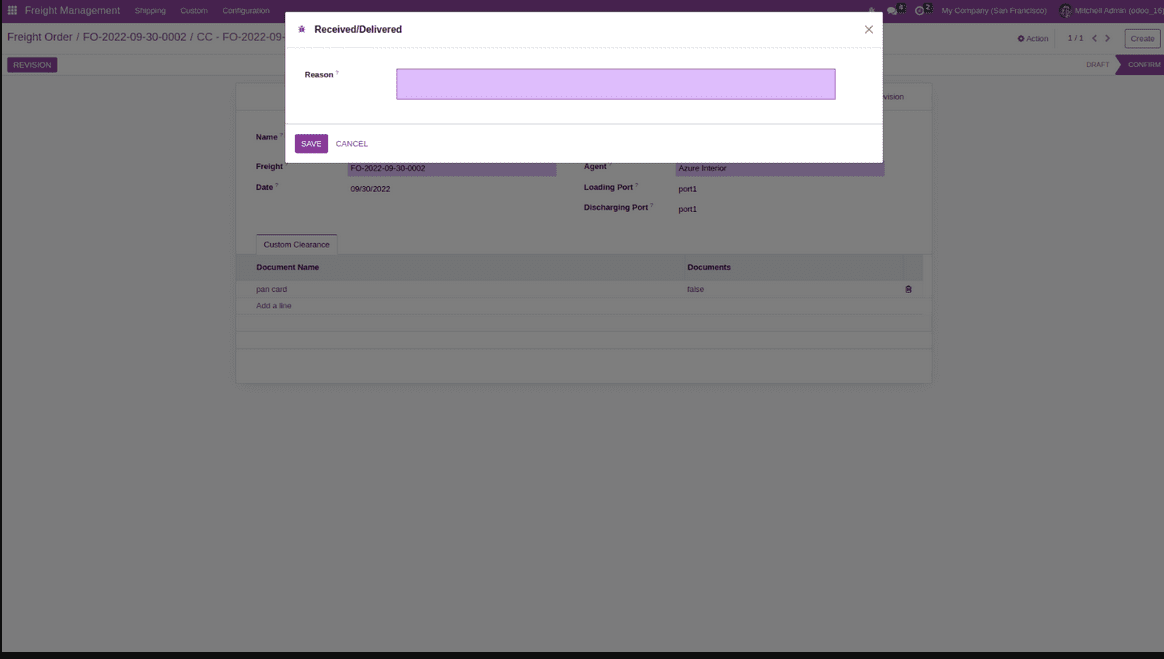
6. Custom Clearance Revision-
We can create the revision for the custom clearance by clicking the revision button. We can view the custom clearance revision from the Revision smart button.
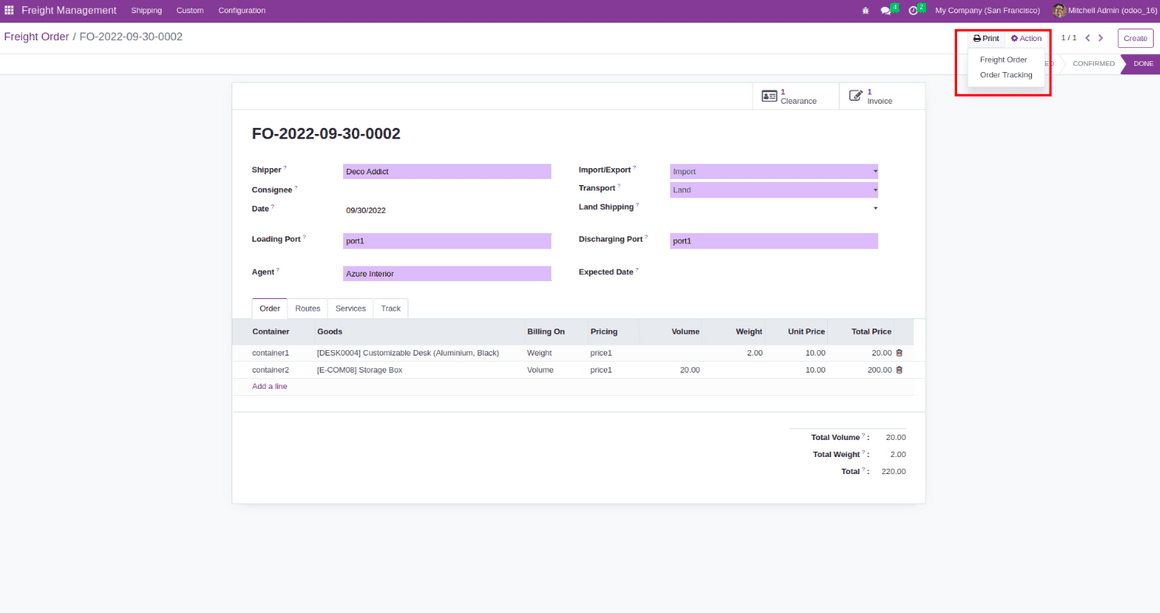
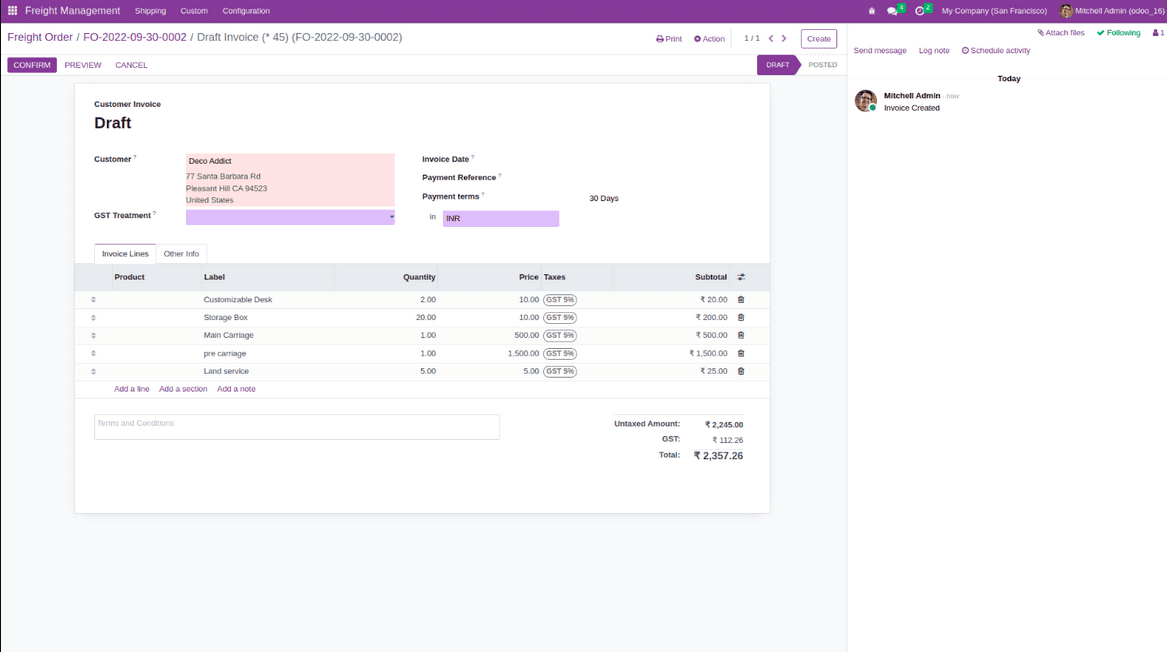
7. Freight Order Invoice-
We can create the invoice for the freight order by clicking the invoice button.
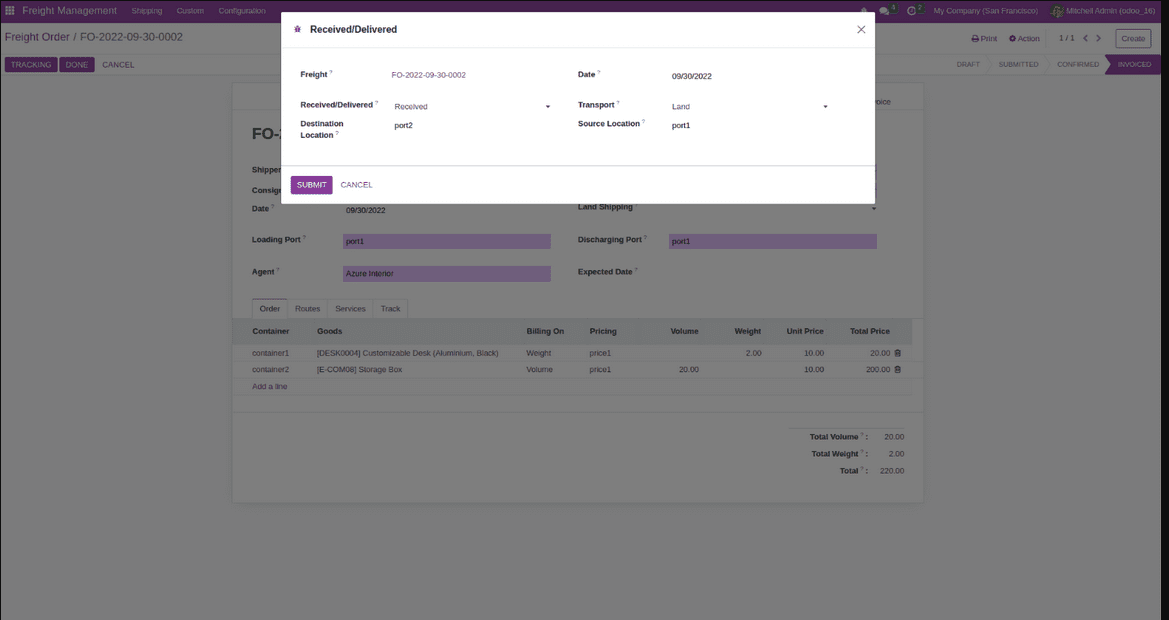
8. Freight Order Tracking-
we can track our order by clicking the tracking button.
9. Freight Order Reporting-
From the action bar, we can print the fright order report and order tracked report.
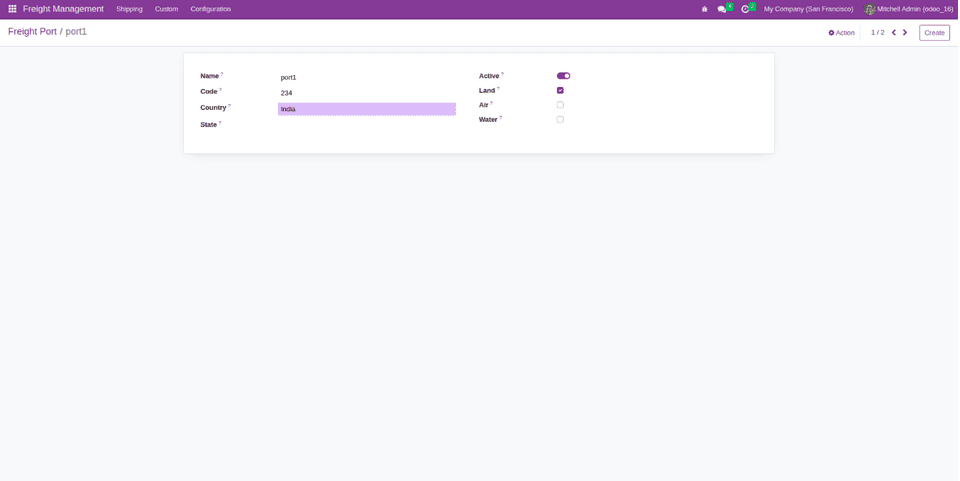
10. Configure Ports-
Under the configuration menu, we can see a port menu for configuring our ports. Here we can specify the port location and available transport methods.
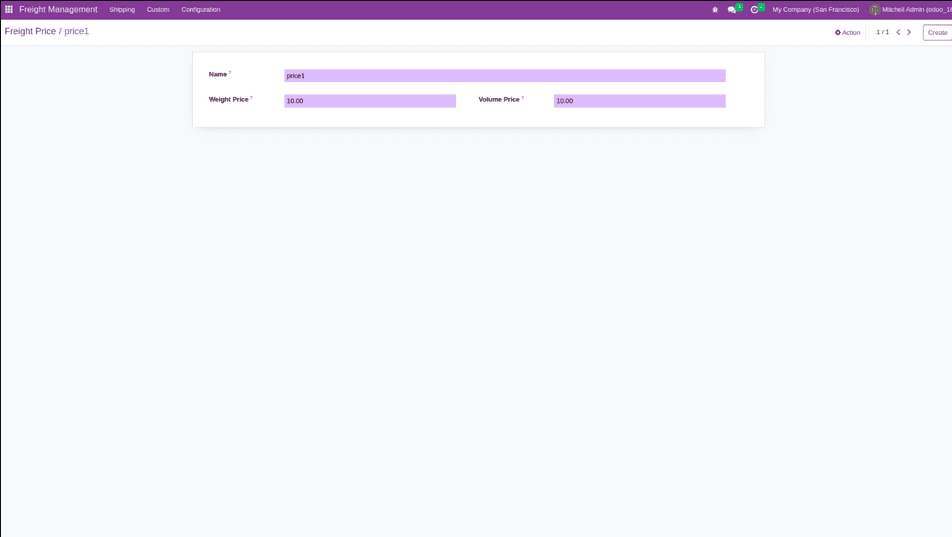
11. Configure Pricing-
In the configuration menu, we can see the price list used to set the price. Here we can specify the value for weight and volume.
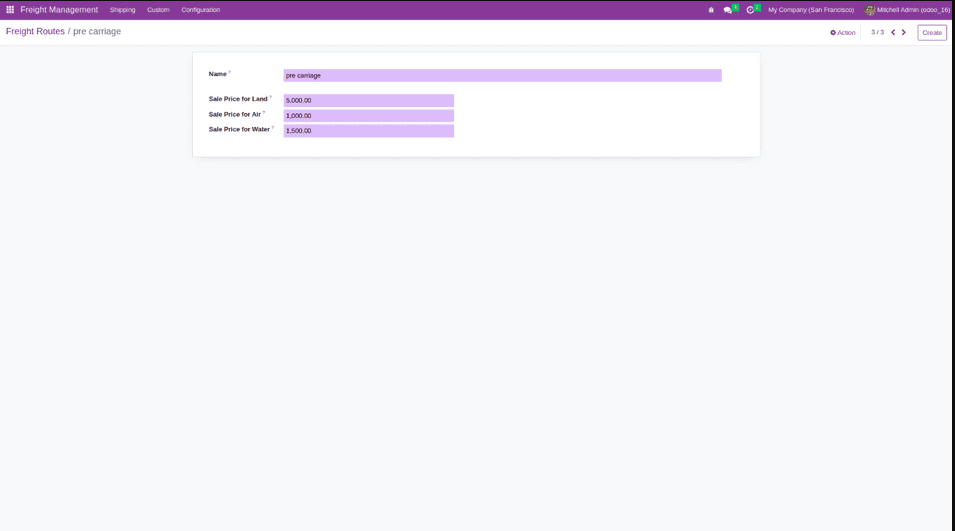
12. Configure Route Operation-
Under the configuration menu, we can see a Route operation menu, which is used to configure the routes.
14. Configure services-
In the configuration menu, we can see the menu used to configure the service. Here we can set an exception for a particular vendor.
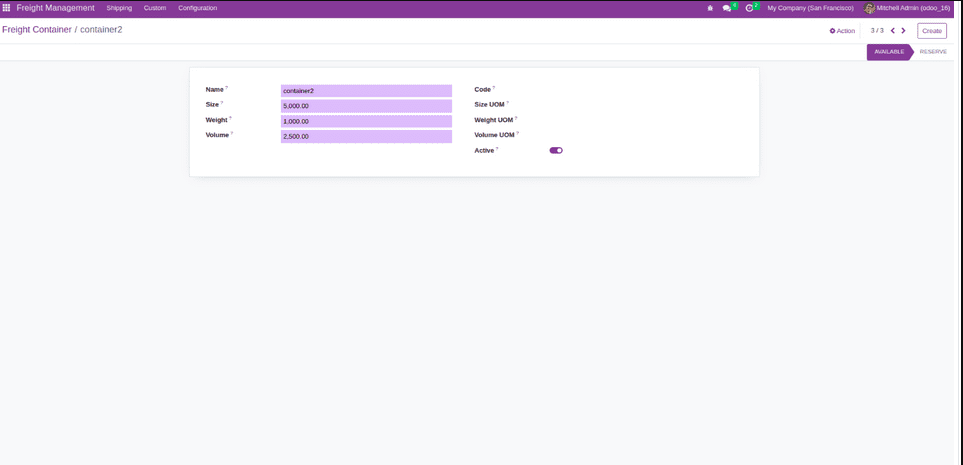
13. Configure container-
Under the configuration menu, there is a Containers menu, and it is used to configuring the Container. Here we can specify the weight and volume. If we add more goods than container capacity, it shows a warning message. Once the order is confirmed for a particular container, we can't use it for another order.